Difference between revisions of "NetBeans"
| Line 48: | Line 48: | ||
Proceed similarly to lttoolbox by creating the project with existing sources, and selecting the binary to debug. |
Proceed similarly to lttoolbox by creating the project with existing sources, and selecting the binary to debug. |
||
| + | [[File:Apertium-20-make.png|200px|none]] |
||
Then from Run, adjust the Environment by adding LD_LIBRARY_PATH pointing to both the lttoolbox and apertium .libs folder that has the built libraries, and setting LC_ALL to a UTF-8 capable locale: |
Then from Run, adjust the Environment by adding LD_LIBRARY_PATH pointing to both the lttoolbox and apertium .libs folder that has the built libraries, and setting LC_ALL to a UTF-8 capable locale: |
||
Latest revision as of 10:21, 3 June 2017
If you want to work with the Apertium native core tools, but you really don't want to go through the arduous process of command line debugging, you can instead use a combination of initial command line setup and then have NetBeans take over.
Paths are going to reference /home/tino/Desktop as that is where I tested this. Substitute with your own paths.
NetBeans[edit]
First thing you need is to install NetBeans from somewhere. If on Debian/Ubuntu, sudo apt-get install netbeans will do. Once installed, you probably need to add the C/C++ plugin.
From Tools → Plugins:
- In the Settings tab, enable all Update Centers.
- Then in Available Plugins, hit "Check for Newest" and find the
C/C++plugin. - Then in Updates, hit "Check for Updates" and update all available plugins.
Lttoolbox[edit]
Initial command line setup:
svn co https://svn.code.sf.net/p/apertium/svn/trunk/lttoolbox
cd lttoolbox
autoreconf -fi
./configure --enable-debug
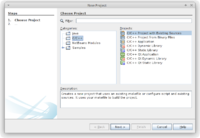
Then from NetBeans, File → New Project → C/C++ → C/C++ Project with Existing Sources:
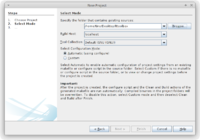
Next, Browse to the folder that has the project's configure.ac file. Leave everything else as-is and Finish:
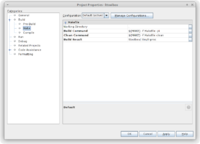
From Project Properties, in the Build → Make foldout, adjust the Build Command with more -j if you want, and set the Build Result to the executable you want to debug. Make sure to select the actual binary from .libs and not the wrapper script:
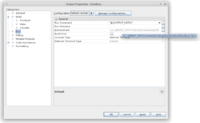
Then from Run, adjust the Environment by adding LD_LIBRARY_PATH pointing to the .libs folder that has the built libraries:
Also adjust the Run Command to pass it the arguments and files you need. In order to echo input directly to the command, instead append to the Run Command as a redirect file like <(echo "input goes here")
And you're good to go. You should now be able to run, debug, set breakpoints, inspect state, and everything else you expect from working with an IDE.
Apertium[edit]
Initial command line setup. Since we do not make install anything, we need to define the APERTIUM_* envvars manually:
svn co https://svn.code.sf.net/p/apertium/svn/trunk/apertium
cd apertium
autoreconf -fi
export 'APERTIUM_CFLAGS=-I/home/tino/Desktop/lttoolbox/ -I/usr/include/libxml2/'
export 'APERTIUM_LIBS=-L/home/tino/Desktop/lttoolbox/lttoolbox/.libs/ -llttoolbox3'
./configure --enable-debug
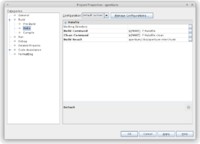
Proceed similarly to lttoolbox by creating the project with existing sources, and selecting the binary to debug.
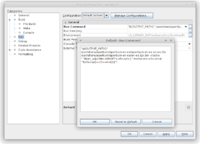
Then from Run, adjust the Environment by adding LD_LIBRARY_PATH pointing to both the lttoolbox and apertium .libs folder that has the built libraries, and setting LC_ALL to a UTF-8 capable locale:
Also adjust the Run Command to what you actually want to debug:
