Difference between revisions of "NetBeans"
(work-in-progress) |
(work-in-progress) |
||
| Line 18: | Line 18: | ||
</pre> |
</pre> |
||
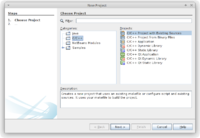
Then from NetBeans, File → New Project → C/C++ → C/C++ Project with Existing Sources |
Then from NetBeans, File → New Project → C/C++ → C/C++ Project with Existing Sources: |
||
[[File:Netbeans-20-new.png|200px|none]] |
|||
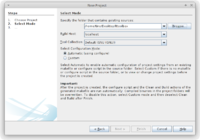
Next, Browse to the folder that has the project's configure.ac file. Leave everything else as-is and Finish: |
|||
[[File:Netbeans-30-new.png|200px|none]] |
|||
== Apertium == |
== Apertium == |
||
Revision as of 14:48, 2 June 2017
If you want to work with the Apertium native core tools, but you really don't want to go through the arduous process of command line debugging, you can instead use a combination of initial command line setup and then have NetBeans take over.
NetBeans
First thing you need is to install NetBeans from somewhere. If on Debian/Ubuntu, sudo apt-get install netbeans will do. Once installed, you probably need to add the C/C++ plugin.
From Tools → Plugins:
- In the Settings tab, enable all Update Centers.
- Then in Available Plugins, hit "Check for Newest" and find the
C/C++plugin. - Then in Updates, hit "Check for Updates" and update all available plugins.
Lttoolbox
Initial command line setup:
svn co https://svn.code.sf.net/p/apertium/svn/trunk/lttoolbox
cd lttoolbox
autoreconf -fi
./configure --enable-debug
Then from NetBeans, File → New Project → C/C++ → C/C++ Project with Existing Sources:
Next, Browse to the folder that has the project's configure.ac file. Leave everything else as-is and Finish:
Apertium
Assuming you did all this in /home/tino/Desktop, you'd do export 'APERTIUM_CFLAGS=-I/home/tino/Desktop/lttoolbox/ -I/usr/include/libxml2/ -L/home/tino/Desktop/lttoolbox/lttoolbox/.libs/' 'APERTIUM_LIBS=-L/home/tino/Desktop/lttoolbox/lttoolbox/.libs/ -llttoolbox3'

