Difference between revisions of "Getting started with Annotatrix"
(Second deliverable) |
|||
| (8 intermediate revisions by one other user not shown) | |||
| Line 1: | Line 1: | ||
{{TOCD}} |
|||
| ⚫ | |||
| ⚫ | |||
| ⚫ | |||
| ⚫ | |||
The related files able to manage are the TSX and generation of prob files using your own tsx and dix files, getting the logs of the prob building process and the prob file |
|||
| ⚫ | |||
==How to use Annotatrix == |
==How to use Annotatrix == |
||
The welcome view of annotatrix has the links to go to tagger index, login, sign |
The welcome view of annotatrix has the links to go to tagger index, login, sign in, tsx files manager, trainer on-fly, go to admin site and to insert a new corpus |
||
[[File:annotatrix_main_index.png | 600px]] |
[[File:annotatrix_main_index.png | 600px]] |
||
Once you click in one of the other views the system ask you to login, If you have an account you can log in as user, otherwise click on the upper right button to get an account signing |
Once you click in one of the other views the system ask you to login, If you have an account you can log in as user, otherwise click on the upper right button to get an account signing in |
||
[[File:annotatrix_sign_in.png | 600px]] |
|||
| ⚫ | |||
| ⚫ | |||
[[File:annotatrix_login.png | 600px]] |
[[File:annotatrix_login.png | 600px]] |
||
| ⚫ | |||
=Tagger application = |
|||
| ⚫ | |||
[[File:annotatrix_empty_tagger_index.png | 600px]] |
[[File:annotatrix_empty_tagger_index.png | 600px]] |
||
| Line 28: | Line 30: | ||
[[File:annotatrix_tagger_insert_corpus.png | 600px]] |
[[File:annotatrix_tagger_insert_corpus.png | 600px]] |
||
On this view you must to insert a corpus title, select the corpus language and to insert the corpus, you can copy and paste it on the textarea or select a .txt file from your system using the upload file field |
|||
Once you click on Train this corpus you will go to train this corpus, where you can select a mode of the already installed language pairs on the system and train the corpus with this mode, and also upload your own tsx and dix files |
Once you click on Train this corpus you will go to train this corpus, where you can select a mode of the already installed language pairs on the system and train the corpus with this mode, and also upload your own tsx and dix files |
||
| Line 33: | Line 37: | ||
[[File:annotatrix_tagger_new_trainer.png | 600px]] |
[[File:annotatrix_tagger_new_trainer.png | 600px]] |
||
Once you have selected de mode and files (tsx and dix files upload is optional, it will use the language pair tsx and dix default files instead), you can go to the Trainer and start with the corpus disambiguation |
Once you have selected de mode and files (tsx and dix files upload is optional, it will use the language pair tsx and dix default files instead), you can go to the Trainer and start with the corpus disambiguation, to manually disambiguate the selected corpus for the mode desired |
||
[[File:annotatrix_tagger_trainer_upper.png | 600px]] |
[[File:annotatrix_tagger_trainer_upper.png | 600px]] |
||
You have some information as, corpus title, corpus language and mode of this training on the top of the page, on the left part you have the corpus tagged with the ambiguous words in bold and on the right side you have a panel with the disambiguation information for each ambiguous tag |
You have some information as, corpus title, corpus language, dix and tsx files if there aren't the default ones, and mode of this training on the top of the page, on the left part you have the corpus tagged with the ambiguous words in bold and on the right side you have a panel with the disambiguation information for each ambiguous tag |
||
You can choose the tag (bold word) that you desire to disambiguate and you disambiguate it using the numeric pad or the usual numbers according to the alternative number showed on the right panel |
You can choose the tag (bold word) that you desire to disambiguate and you disambiguate it using the numeric pad or the usual numbers according to the alternative number showed on the right panel |
||
| Line 44: | Line 48: | ||
[[File:annotatrix_tagger_trainer_bottom.png | 600px]] |
[[File:annotatrix_tagger_trainer_bottom.png | 600px]] |
||
Also you are able to select the page size selecting how many words per page do you desire, selecting the size on the right side and sending the new value using the button associated to do it, be aware that this will reload this page and you will lost the non saved work |
|||
The corpus tagged is paginated in order to have handle the file in the easiest way for the user, you can go from page to page using next and preview page (if they are available) and also go directly to one page |
The corpus tagged is paginated in order to have handle the file in the easiest way for the user, you can go from page to page using next and preview page (if they are available) and also go directly to one page |
||
[[File:annotatrix_tagger_trainer_page_size.png | 600px]] |
|||
Once you disambiguate at least one word you can save the current training status, and once you finish the training it will generate the prob file automaticatly and also the logs file |
|||
Once you disambiguate at least one word you can save the current training status, and once you finish the training it will generate the prob file automaticaly and also the logs file |
|||
[[File:annotatrix_tagger_trainer_detail_finished.png | 600px]] |
[[File:annotatrix_tagger_trainer_detail_finished.png | 600px]] |
||
You can always check the training details (if the training exists) using the training detail view |
|||
| ⚫ | |||
| ⚫ | Where will show you the training status, showing the corpus text on the lefts, the corpus tagged on the centre (with the ambiguous words on bold) and on the right side the training important information as links to download the logs, corpus text, corpus tagged and prob files and if the training is already finished |
||
[[File:annotatrix_tagger_training_detail_finished.png | 600px]] |
|||
Once a corpus is inserted on the system you can see the details on the corpus detail view |
Once a corpus is inserted on the system you can see the details on the corpus detail view |
||
| Line 59: | Line 69: | ||
[[File:annotatrix_tagger_corpus_detail.png | 600px]] |
[[File:annotatrix_tagger_corpus_detail.png | 600px]] |
||
=TSX manager= |
|||
| ⚫ | |||
This application let you manage a TSX file in an amazing easy way, you can search locally and globally to all the categories, edit each part of each category, insert new fields and remove the already ones |
|||
On the first time you have the tsx files already inserted by you using the insert tsx view |
|||
[[ File:annotatrix_tsx_insert_new.png | 600px ]] |
|||
You can see the older tsx files used by you, continue editing them from where you leave them or insert a new one to the system |
|||
Once you select a new file or an older one you can see the next view: |
|||
[[ File:annotatrix_tsx_forbid.png | 600px ]] |
|||
Where on the left you have all the labels and on the right you have the tabs for each category, with forbid tab selected |
|||
You can see the tsx file, and search on top input of each category and to search globally just have to type on the labels one and select the global search option (on the next picture has been search globally for "adv") on the top right of the label secction |
|||
[[ File:annotatrix_tsx_global_search_adv.png | 600px ]] |
|||
When you want to insert a new item of each category you can use the form on the bottom of the category |
|||
[[ File:annotatrix_tsx_enforce.png | 600px ]] |
|||
To modify the category you have to click on the edit toggle button and it will appear the editions icons to edit each element of the selected category, once you finish the edition of the inner element you have to click on the ok icon to save the changes |
|||
[[ File:annotatrix_tsx_mult.png | 600px ]] |
|||
You can modify inside each item or directly remove the whole element using the trash icon |
|||
[[ File:annotatrix_tsx_preferences.png | 600px ]] |
|||
Always you submit the changes of the file you can download a copy of it, and to update the file you just have to click on the update button on the top right of the view |
|||
=Trainer on-fly= |
|||
This application simplify the process of build the prob file and let you build one using your own dix and tsx files plus the corpus and mode needed to generate the proper prob file |
|||
On the first part you have a view where you can see the older trainers made by your user and also insert a new trainer using the files needed as dix, tsx, corpus (in plain text) and the tagged corpus |
|||
[[ File:annotatrix_trainer_insert.png | 600px ]] |
|||
Those files can be gotten downloading them from training details view and using your own dix and tsx files |
|||
Once you insert or select a trainer you can train it and get the prob and logs files on the trainer_details view |
|||
[[ File:annotatrix_trainer_detail_finished.png | 600px ]] |
|||
=Global application and feedback= |
|||
| ⚫ | |||
[[File:annotatrix_admin_site.png | 600px]] |
[[File:annotatrix_admin_site.png | 600px]] |
||
If you want to send a feedback you have a button on the right bottom of the system that allow you to send a email to the admin |
|||
[[File:annotatrix_feedback.png | 600px]] |
|||
| ⚫ | |||
| ⚫ | |||
| ⚫ | |||
Latest revision as of 11:14, 29 October 2014
Annotatrix is an open source tool included on the Apertium project that let you train corpora and manage related files with a friendly user interface and letting you focus your effort on the disambiguation process abstracting your mind of what is happening under the hook
The related files able to manage are the TSX and generation of prob files using your own tsx and dix files, getting the logs of the prob building process and the prob file
How to use Annotatrix[edit]
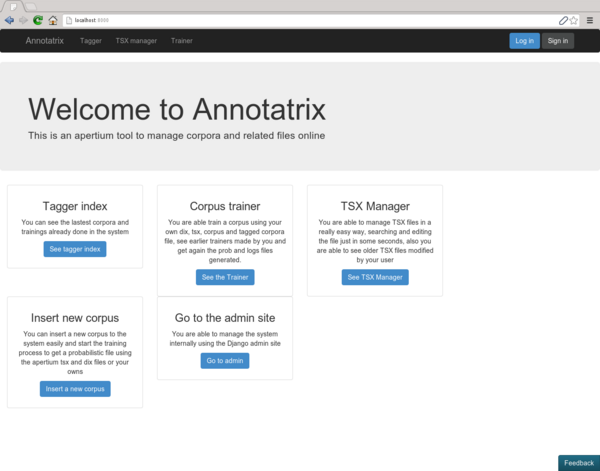
The welcome view of annotatrix has the links to go to tagger index, login, sign in, tsx files manager, trainer on-fly, go to admin site and to insert a new corpus
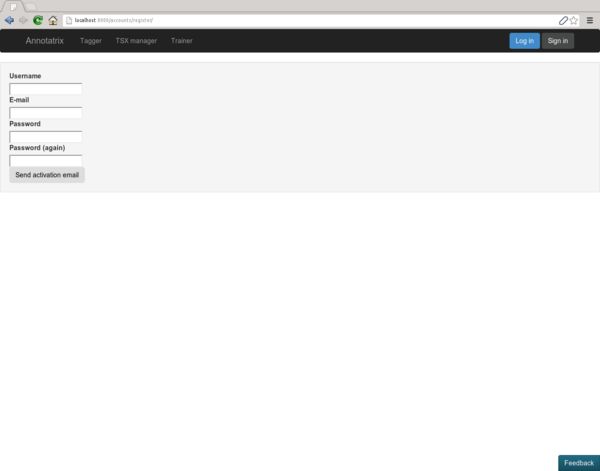
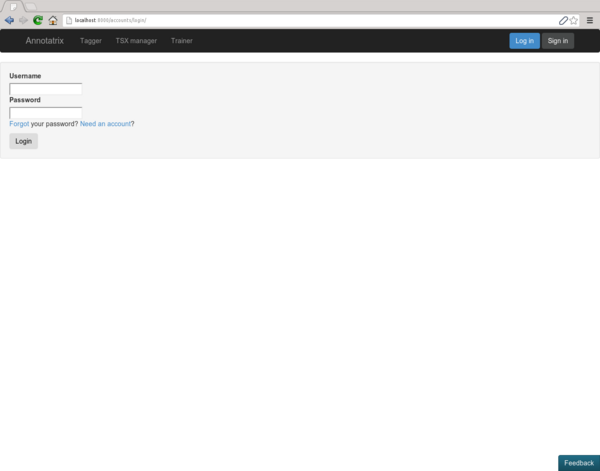
Once you click in one of the other views the system ask you to login, If you have an account you can log in as user, otherwise click on the upper right button to get an account signing in
Once you complete the sign up form it will send you an email with the activation link valid for a week (so hurry up and activate your account before the time expire) and start using this amazing application
Tagger application[edit]
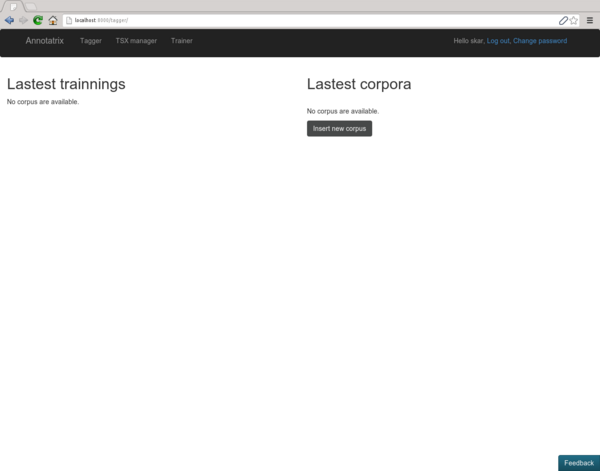
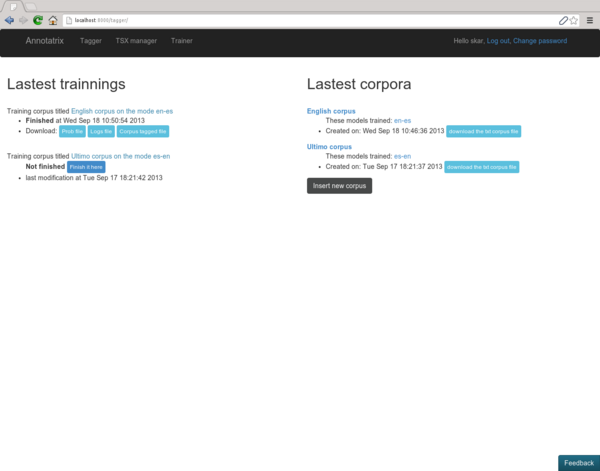
Once you are logged in you can see the latest corpora and training made on the system from the tagger index. From this view you are able to see corpora and training details, insert new corpora and train them easily
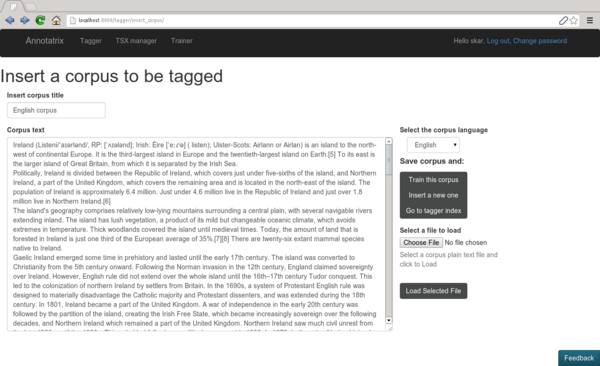
You can insert a new corpus using the link associated and you will see this other view:
On this view you must to insert a corpus title, select the corpus language and to insert the corpus, you can copy and paste it on the textarea or select a .txt file from your system using the upload file field
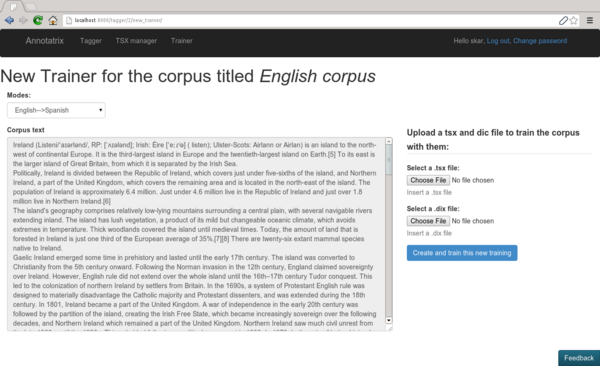
Once you click on Train this corpus you will go to train this corpus, where you can select a mode of the already installed language pairs on the system and train the corpus with this mode, and also upload your own tsx and dix files
Once you have selected de mode and files (tsx and dix files upload is optional, it will use the language pair tsx and dix default files instead), you can go to the Trainer and start with the corpus disambiguation, to manually disambiguate the selected corpus for the mode desired
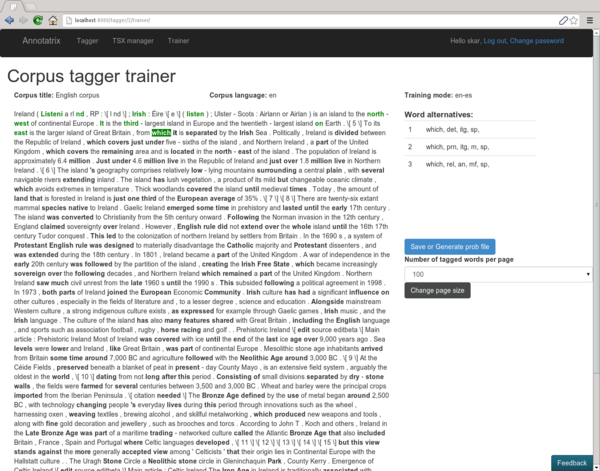
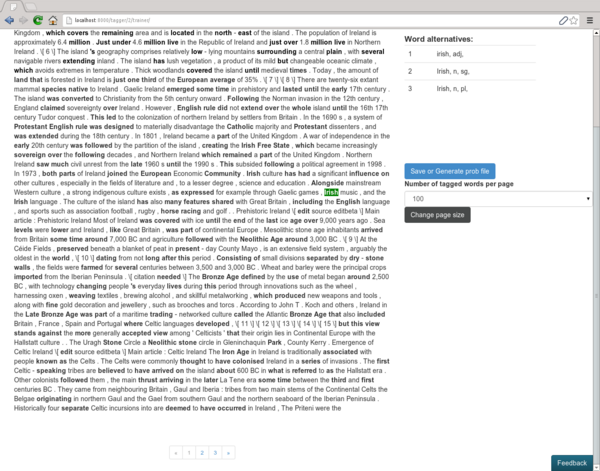
You have some information as, corpus title, corpus language, dix and tsx files if there aren't the default ones, and mode of this training on the top of the page, on the left part you have the corpus tagged with the ambiguous words in bold and on the right side you have a panel with the disambiguation information for each ambiguous tag
You can choose the tag (bold word) that you desire to disambiguate and you disambiguate it using the numeric pad or the usual numbers according to the alternative number showed on the right panel
You can select the ambiguous word using the right and left arrow keys and also clicking on them
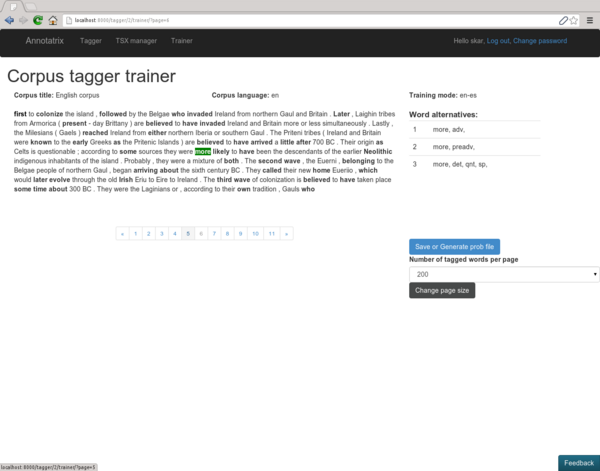
Also you are able to select the page size selecting how many words per page do you desire, selecting the size on the right side and sending the new value using the button associated to do it, be aware that this will reload this page and you will lost the non saved work
The corpus tagged is paginated in order to have handle the file in the easiest way for the user, you can go from page to page using next and preview page (if they are available) and also go directly to one page
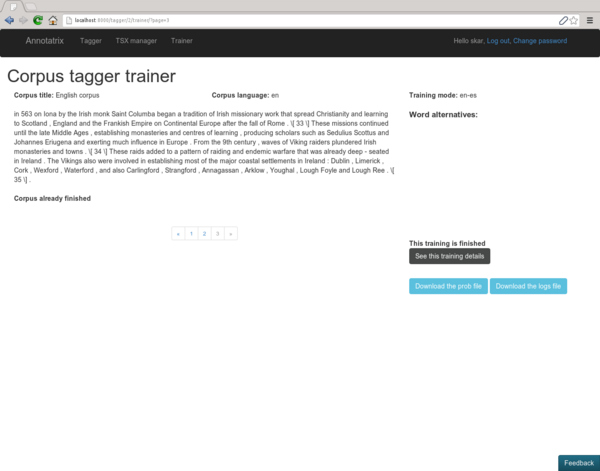
Once you disambiguate at least one word you can save the current training status, and once you finish the training it will generate the prob file automaticaly and also the logs file
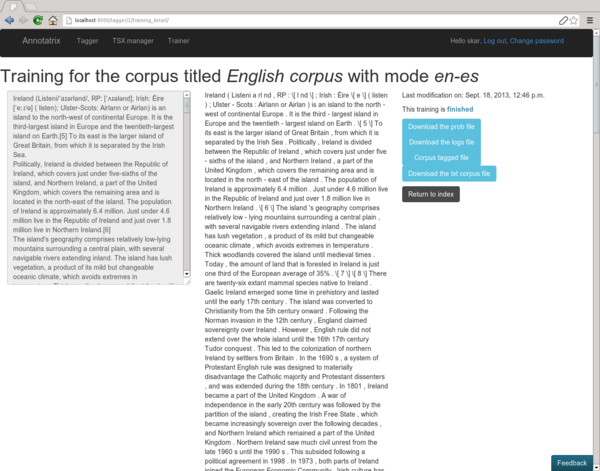
You can always check the training details (if the training exists) using the training detail view
Where will show you the training status, showing the corpus text on the lefts, the corpus tagged on the centre (with the ambiguous words on bold) and on the right side the training important information as links to download the logs, corpus text, corpus tagged and prob files and if the training is already finished
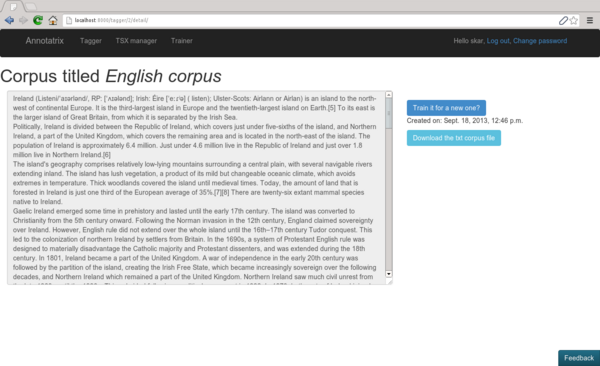
Once a corpus is inserted on the system you can see the details on the corpus detail view
TSX manager[edit]
This application let you manage a TSX file in an amazing easy way, you can search locally and globally to all the categories, edit each part of each category, insert new fields and remove the already ones
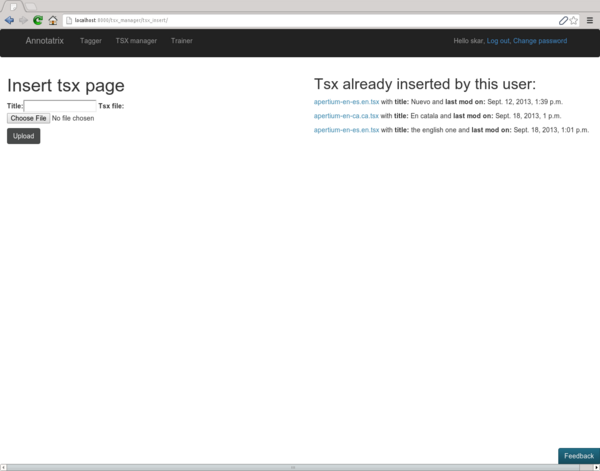
On the first time you have the tsx files already inserted by you using the insert tsx view
You can see the older tsx files used by you, continue editing them from where you leave them or insert a new one to the system
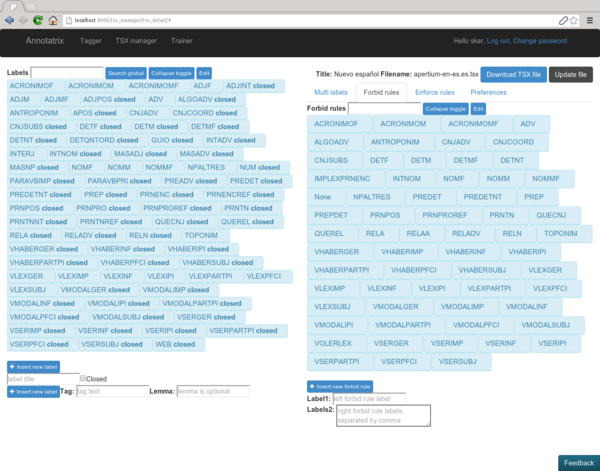
Once you select a new file or an older one you can see the next view:
Where on the left you have all the labels and on the right you have the tabs for each category, with forbid tab selected
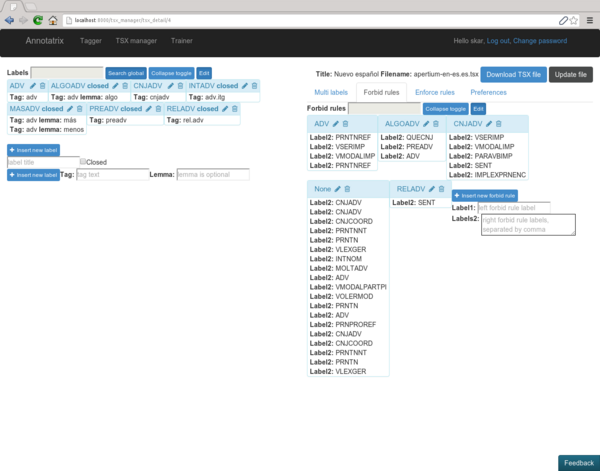
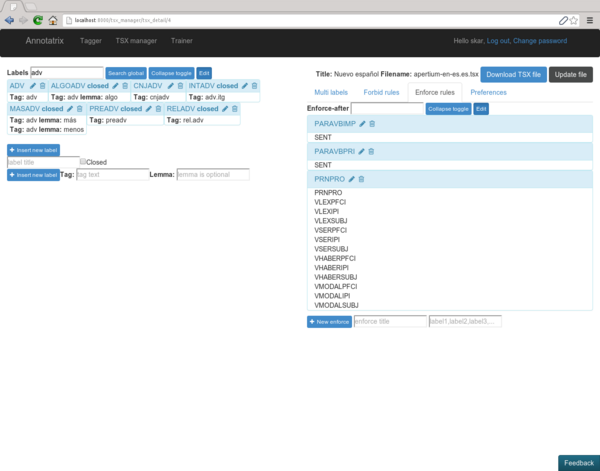
You can see the tsx file, and search on top input of each category and to search globally just have to type on the labels one and select the global search option (on the next picture has been search globally for "adv") on the top right of the label secction
When you want to insert a new item of each category you can use the form on the bottom of the category
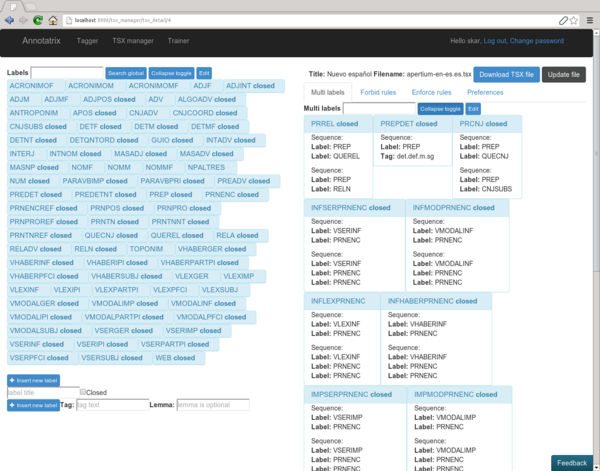
To modify the category you have to click on the edit toggle button and it will appear the editions icons to edit each element of the selected category, once you finish the edition of the inner element you have to click on the ok icon to save the changes
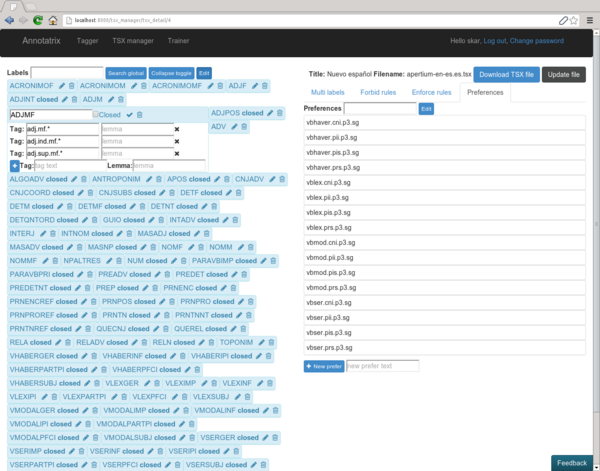
You can modify inside each item or directly remove the whole element using the trash icon
Always you submit the changes of the file you can download a copy of it, and to update the file you just have to click on the update button on the top right of the view
Trainer on-fly[edit]
This application simplify the process of build the prob file and let you build one using your own dix and tsx files plus the corpus and mode needed to generate the proper prob file
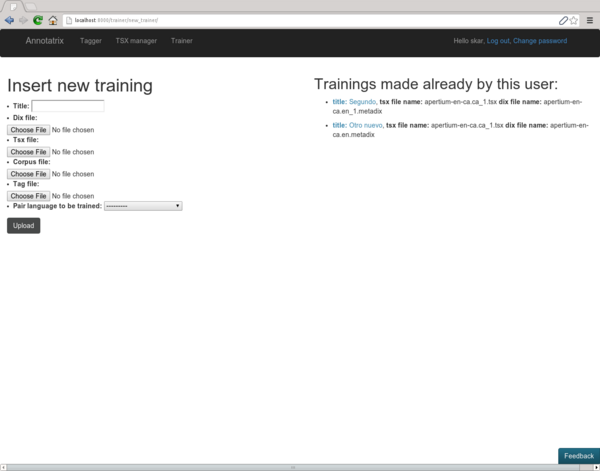
On the first part you have a view where you can see the older trainers made by your user and also insert a new trainer using the files needed as dix, tsx, corpus (in plain text) and the tagged corpus
Those files can be gotten downloading them from training details view and using your own dix and tsx files
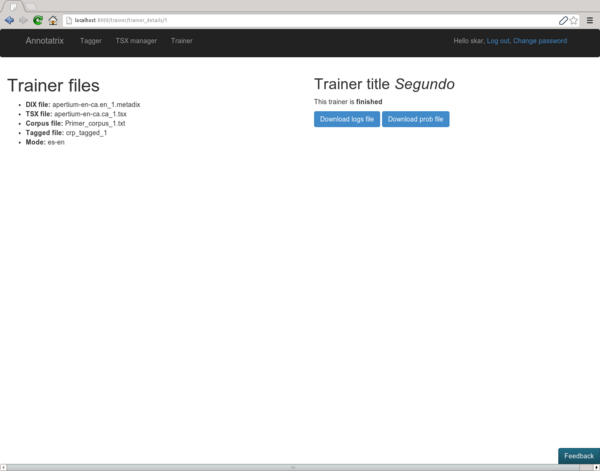
Once you insert or select a trainer you can train it and get the prob and logs files on the trainer_details view
Global application and feedback[edit]
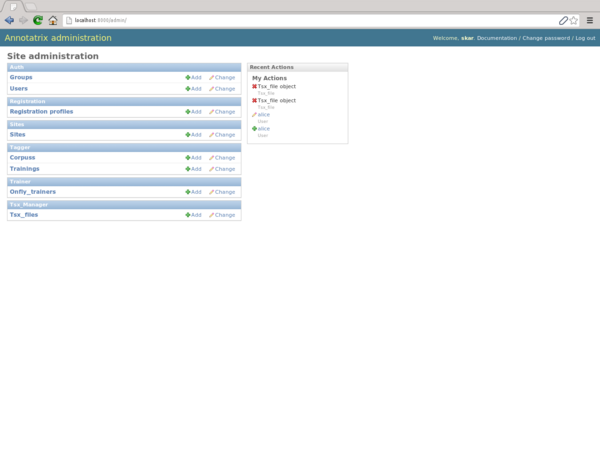
Also annotatrix has an admin site where the site administrator can add and remove manually corpora, trainings, tsx_files and trainers, and see the system from the backend
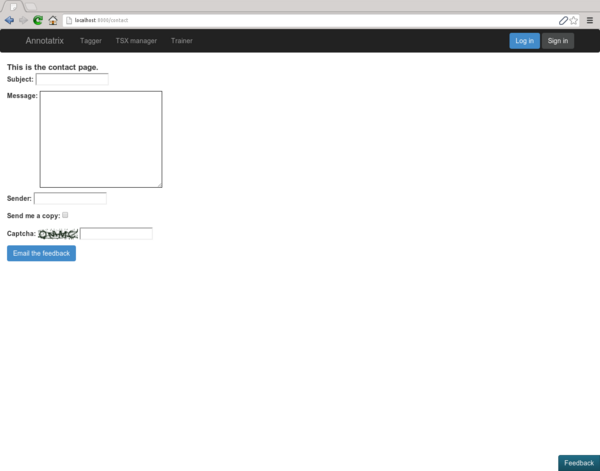
If you want to send a feedback you have a button on the right bottom of the system that allow you to send a email to the admin
Run Annotatrix locally[edit]
To have Annotatrix running locally here you have the installation tutorial on the README file of the project
